14 Feb Bursting MongoDB to a Remote Kubernetes Cluster in Minutes: Part 1 — Introductions and Setup
The cloud has become the default option for many enterprises. However, enterprises are still faced with the challenge of selecting which cloud provider to use. There are three major problems that enterprises face when it comes to selecting a cloud provider: Optimizing costs and ROI, aiming at best of breed, and avoiding cloud lock-ins — including high availability and future-proofing.
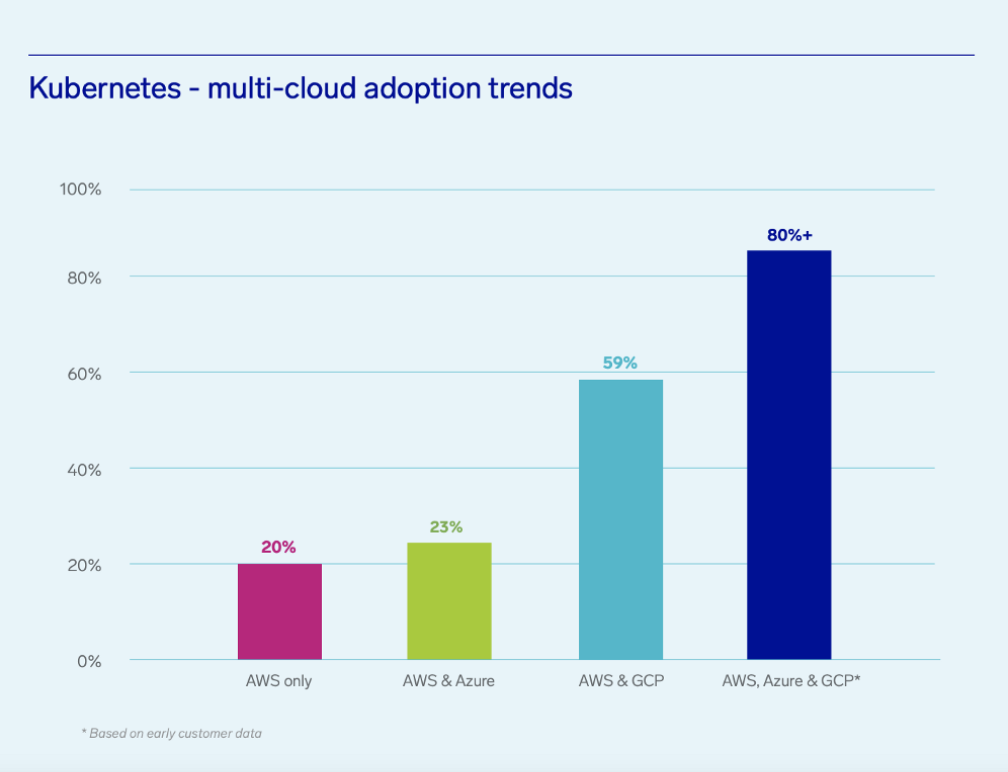
To solve these problems, companies have started turning towards multi-cloud strategies where Kubernetes is the dominant approach for managing cross-cloud infrastructures. As shown in the following chart by Sumologic (2019), cloud agnostics is not a trend.
It is the future of enterprise computing.

Enterprises are no longer restricted to one cloud provider because they can now choose from multiple providers to suit their needs.
Kubernetes is an open-source platform that automates deployment, scaling, and management of containerized applications. It provides a centralized point for managing all containers across multiple hosts and enables application mobility across the cloud providers.
All of the above is straightforward when your applications are stateless. However, moving and scheduling workloads across multiple clouds when you have data is where the challenge begins.
Databases Geo spreading is already a practice in the field. It allows you to place your data closer to your app and, in addition, provide high availability over regions and/or availability zones.
For this example, we will make the configuration of MongoDB manually, using mongocli, for simplicity and clarity. In production environments, it is highly recommended to use an Operator that will maintain and control these settings.
About ionir — Kubernetes Meets Data
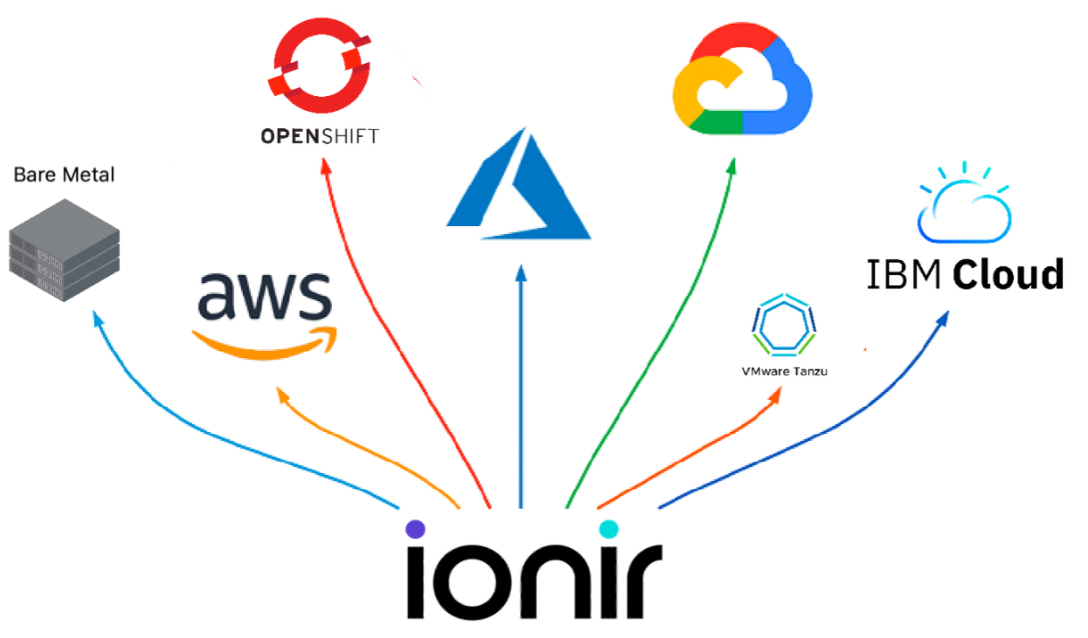
ionir delivers Kubernetes Native Storage that eliminates data gravity, allowing application data to move at the speed of applications. Full volumes, regardless of size or amount of data, are transported across clouds or across the world in less than forty seconds. Now you’re more agile than your competition — making decisions faster, innovating quicker, and operating more effectively.

What’s more, your data is better protected. ionir is the only Kubernetes Native Storage solution that delivers unified enterprise-class data and storage management capabilities — performance, CDP, tiering, deduplication, replication and more — all delivered without enterprise complexity. ionir is pure software, installs in minutes with one command, and runs alongside application containers, orchestrated by Kubernetes.
Now, Let’s Deploy MongoDB on K8s and ionir
We start with two Kubernetes clusters with ionir installed in two data centers or regions. The first step is to deploy a MongoDB StatefulSet that will act as our “Primary” node on Cluster A, this is an example YAML file:
apiVersion: apps/v1
kind: StatefulSet
metadata:
name: mongodb
labels:
appdb: mongodb
spec:
replicas: 1
selector:
matchLabels:
app: mongodb
serviceName: mongodb
template:
metadata:
labels:
app: MongoDB
spec:
terminationGracePeriodSeconds: 10
containers:
- name: mongodb
image: mongo
command:
- mongod
- "--storageEngine"
- wiredTiger
- "--bind_ip_all"
- "--replSet"
- rs0
ports:
- containerPort: 27017
volumeMounts:
- name: mongo-data
mountPath: /data/db
volumeClaimTemplates:
- metadata:
name: mongo-data
spec:
storageClassName: ionir-default
accessModes: [ "ReadWriteOnce" ]
volumeMode: Filesystem
resources:
requests:
storage: 40Gi
---
apiVersion: v1
kind: Service
metadata:
name: mongodb
labels:
app: mongodb
spec:
type: LoadBalancer
ports:
- name: mongodb
port: 27017
targetPort: 27017
selector:
app: mongodb
We deployed a StatefulSet, redirecting the /data/db to a PVC created by ionir-default storageclass using a volumeClaimTemplate. By default, a MongoDB replica set named “rs0” is created. In addition, we have deployed a LoadBalancer service to allow external access to the setup.
Once the pod is up (kubectl get pods), we exec into it (kubectl exec -it mongodb — mongo) and run the following commands to initiate the setup:
var cfg = rs.conf();
cfg.members[0].host=”your-service-external-ip:27017";
cfg.members[0].priority = 100
rs.reconfig(cfg); get pods
Make sure your-service-external-ip is replaced with your LoadBalancer service IP.
You can run the following command to make sure you specify a write concern to your setup:
db.adminCommand({ “setDefaultRWConcern” : 1, “defaultWriteConcern” : { “w” : 1 } })
At this stage, you have a fully operational, single node, MongoDB that can be accessed remotely. Now, you can import your data and populate your volume. You can find an example script on our GitHub account here.
Final Thoughts
A MongoDB replica set should include a minimum of three data-bearing nodes: one primary node and two secondary nodes. If two secondary replicas are not possible, you may consider employing an Arbiter node instead of one data-bearing node — and this is exactly what we are going to demonstrate in this multi-series post.
In the next chapter, we will deploy our Arbitrar (witness) and burst to our target Kubernetes cluster, running in multi-cloud mode.


